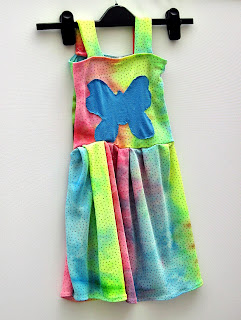
With a bit of discussion we came up with the following dress, that could also be worn on other occasions to.
 |
| Girls jersey dress with butterfly motif |

I have used a multicolour two way stretch jersey I already had, but you could use old t-shirts sewn together, any stretchy fabric will do . So here is how I made my butterfly dress.
Measurements needed are chest circumference measurement + 2 inches (example chest measurement 22 inches + 2 inches = 24 inches )
Armpit to waist measurement + 1 inch (example armpit to waist =10 inches + 1 inch = 11 inches )
Waist to knee length + 1 inch (Example waist to knee measures 14 inches + 1 inch = 15 inches )
Measurement over shoulder , armpit front to armpit back = 5 inches
First cut out 2 x chest pieces measuring chest + 2 inches divided by 2 this measurement needs to follow the stretch of the fabric so that it will stretch around the childs body x (Armpit to waist measurement + 1 inch)For my example each piece measures 12 inches x 11 inches
Then cut out 2 skirt pieces measuring (waist to knee + 1 inch) across the non stretchy direction of the fabric , and following the stretch of the fabric measure (Chest + 2 inches x 1 1/2 )divided by 2 , if you want a fuller skirt measure 2 x waist measurement for this dimension. In my example my skirt pieces measured 15 inches x 18 inches
Cut out 4 x strap pieces measuring over shoulder length measurement (along the stretch of the fabric), so shoulder straps will stretch over the shoulder x 3 inches
In my dress the strap pieces measured 5 inches x 3 inches
You will also want to cut a butterfly motif out of a contrasting piece of jersey fabric, to do this fold a piece of paper in half and draw half a butterfly shape against the fold and cut out, this gives you a symmetrical butterfly , use this cut out as a pattern for cutting your butterfly shape out. I find it easiest to pin on the fold and fold your paper butterfly back up and cut fabric as you did your paper butterfly.
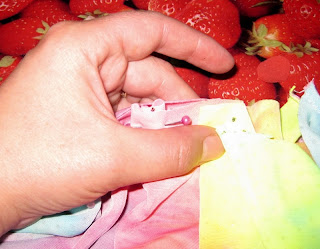
You now need to pin your fabric butterfly to the front of your dress centrally ensuring your butterfly is flat against the dress front , you can fold your piece lengthways to centre up the butterfly as below
 |
| Girls dress tutorial bodice piece |
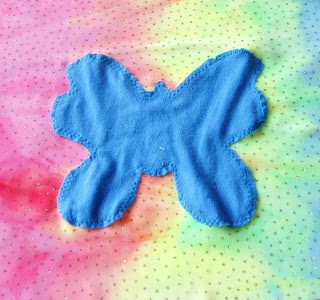
And sew your butterfly to your front dress piece ensuring it is the correct way up using a small zig zag stitch along the edge of your butterfly, when your needle moves to the right it should land just over the raw edge of your butterfly.
You should end up with something like this
 |
| Girls dress butterfly motif |
You now need to place both of your dress top pieces right sides together pinning in my case the shorter 11 inch length together on one side only and serge or sew and zig-zag to prevent fraying using a 5/8 inch seam allowance.
You will now have one length of fabric , next serge or zig-zag along the top of the dress top pieces and turn over 1/4 inch from right side to wrong side and zig-zag to create a stretchy hem.
You now need to sew the other short sides of your dress top together placing the pieces right side to right side again serge or sew and zig-zag with a 5/8 inch seam allowance so that you then have a tube .
 |
| Girls dress finished bodice piece |
Follow the same steps for the skirt pieces again sew 2 pieces together to form one long length , sew the bottom hem and then sew together to form a tube , you will now have two tubes.
To sew the top and skirt together, turn your skirt with the wrong side facing out and the hem at the bottom, and place your top right side facing out hemmed top pushed downwards inside your skirt tube until the raw edges are lined up.
Find your side seams on your skirt and your top and pin the side seam on each side together , find the midpoint between the pins on your skirt and top and again pin together . you will now have 4 equally spaced pins.
Gather your skirt piece evenly and pin to your top using as many pins as you need to hold it in place
Serge or sew and zig-zag using a 5/8 inch seam allowance all around this raw edge you have just pinned, make sure you take your pins out as you go especially if serging. Sergers and pins do not make for a happy couple.
Turn your dress right side out , you are nearly done just need the straps, sew your strap pieces together sew two pieces together, right side to right side using 5/8 inch seam allowance along the long sides of the strips only to form a tube. Turn your tubes right side out , and turn the raw edges at the end of each tube inward and pin one strap at each side of the front of the dress equal distances from the side seams on the inside of the dress front , I measured on my daughter where these needed to go, for me the distance was 1 1/2 inches but this may be different for you, pin your strap pieces same distance apart on the back of the dress .
Sew the strap pieces on where you have pinned them and your dress is done. My butterfly ended up slightly wonky on my dress as unfortunately I had a problem with my serger and some of the dress got snarled up in it , long story short adjustments had to be made . My daughter is in love with the finished dress so its all good. Take a look and see what you think.
If you like my little sew along tutorials I also sell them in my Etsy shop e patterns , or if you enjoy the finished product but not so much the process of creating you can view my finished products for sale in my Etsy shop
Until next time , happy sewing


No comments:
Post a Comment